Getting Started with Core Data and Swift 4
Recently, I’ve started working a lot more with iOS projects in my free time to sharpen my native iOS skills. In learning more about how data can be handled iOS applications, I’ve discovered things such as Core Data and Realm. I haven’t looked into using Realm as of yet, but I have started down the path of Core Data.
I hadn’t found a lot of articles that had an example that I expected when learning Core Data concepts, so I’ve decided to create my own. In this article, we’ll build a simple task tracking app. To note as well, this article will be created using Interface Builder, eventually I may update it to introduce creating everything programatically.
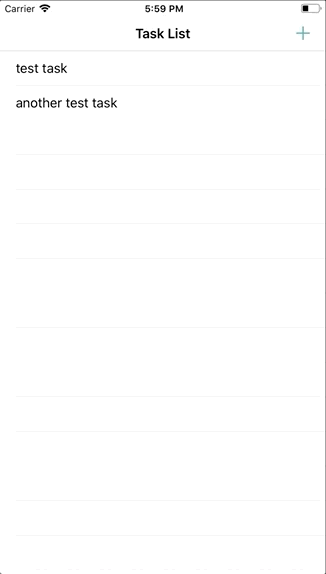
Here’s a preview of what we’ll be building:
Creating the TableView in Interface Builder
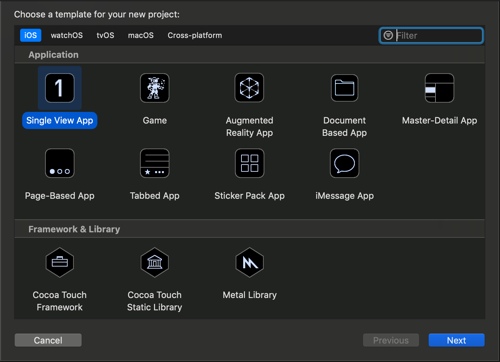
First, open Xcode and create a new project. I’m going to use a Single View App.
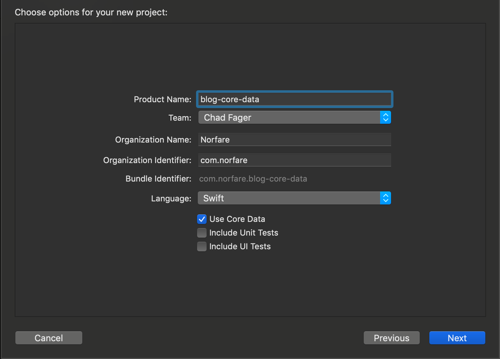
Next, make sure that Core Data is checked in the options for the project.
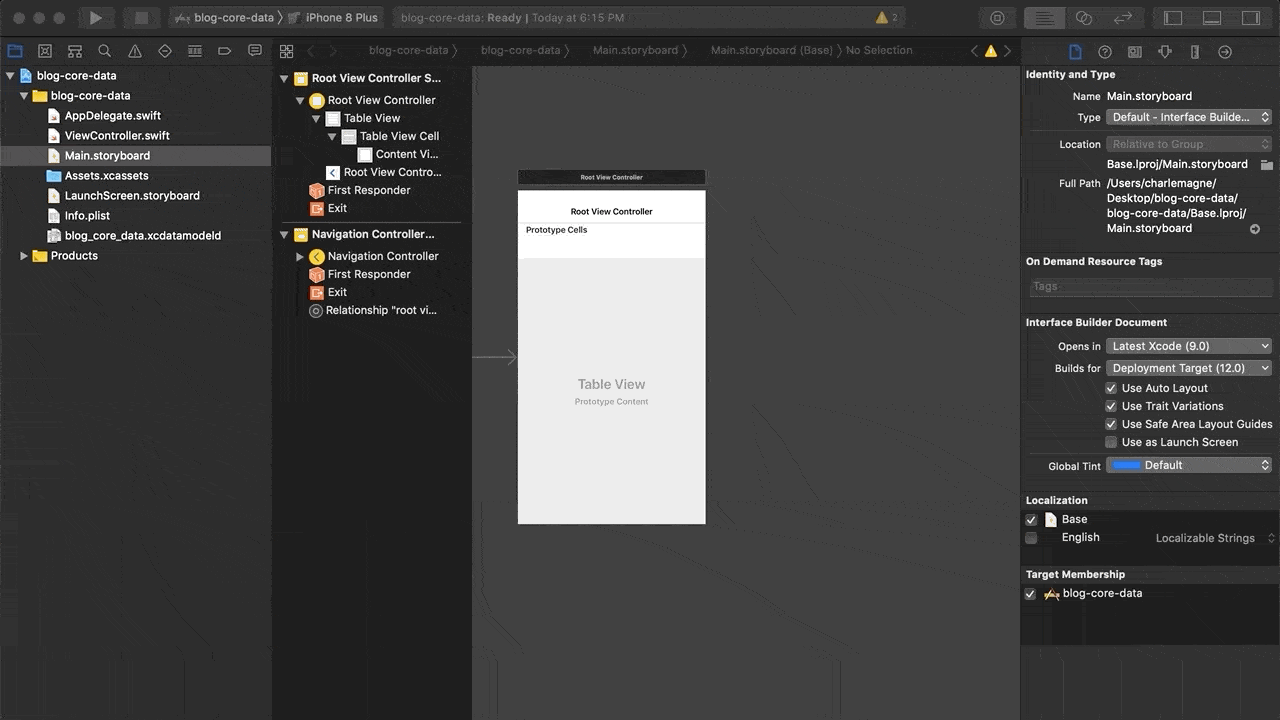
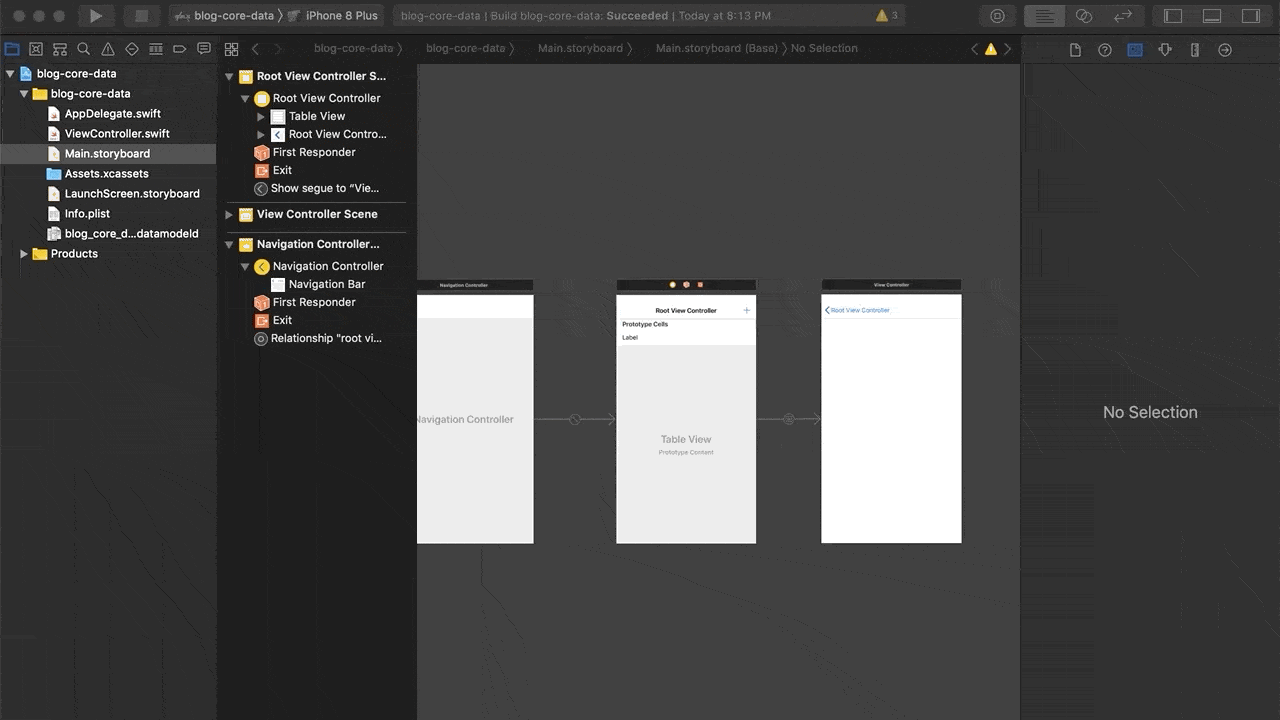
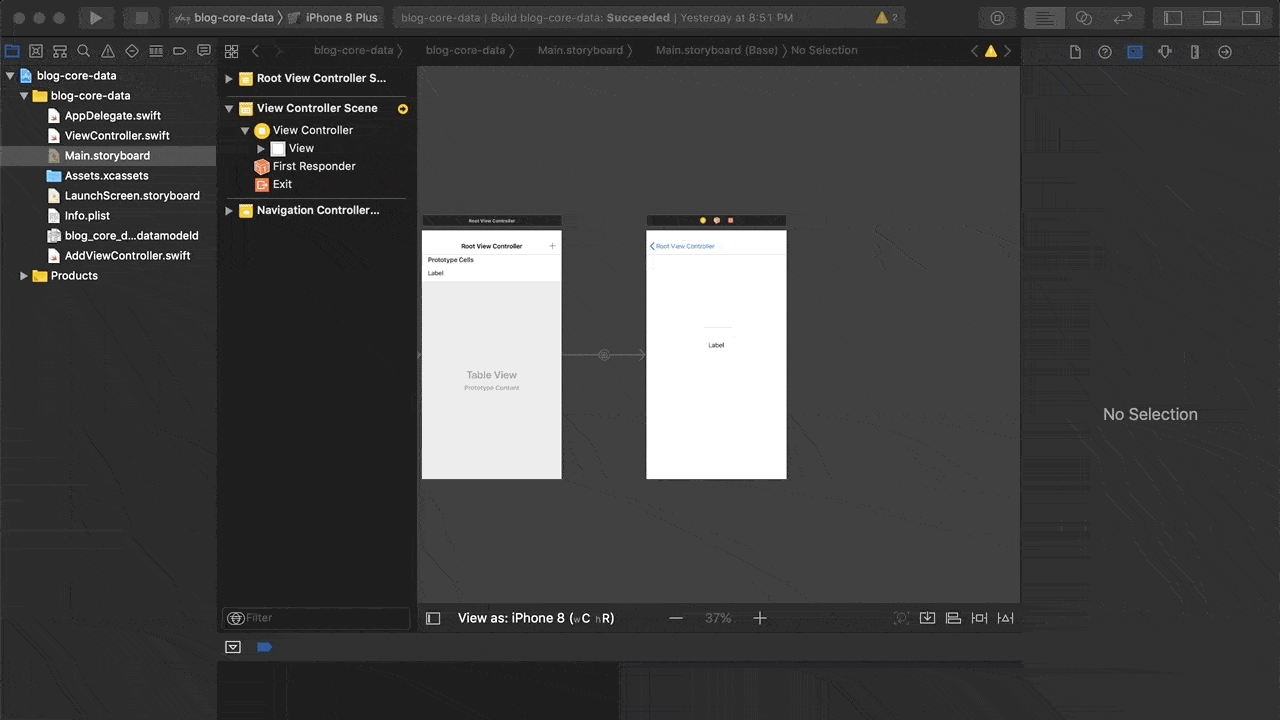
Once your project has been created, we’re going to want to open our main storyboard, Main.storyboard from the project navigator. Within Main.storyboard, delete the existing View Controller and add a new Navigation Controller. We’ll use the Navigation Controller as the “root” view for our application.
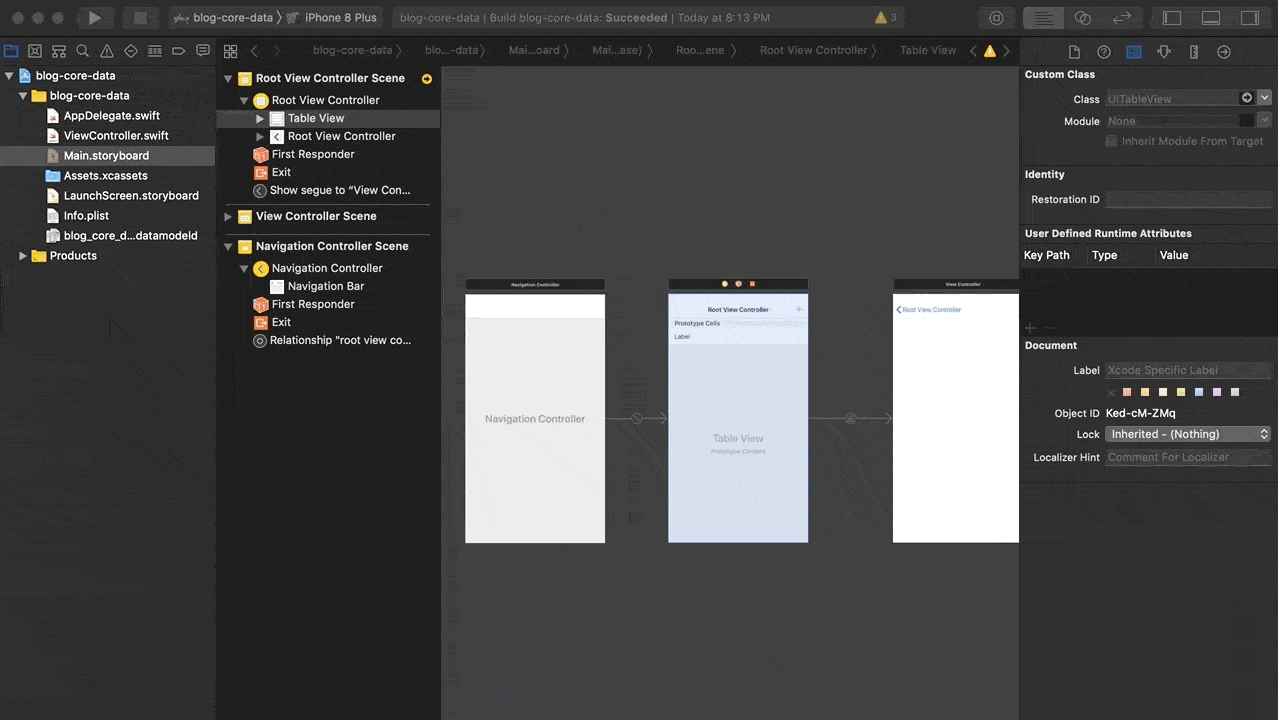
After adding the Navigation Controller to our storyboard, we’re going to want to add a Label to the cells of the Table View that should have been created automatically. This label will be what we use to display our saved tasks from Core Data. After adding the label to the cell, select the “Table View Cell” in our Root View Controller and on the attributes inspector set the Identifier field to “taskCell”
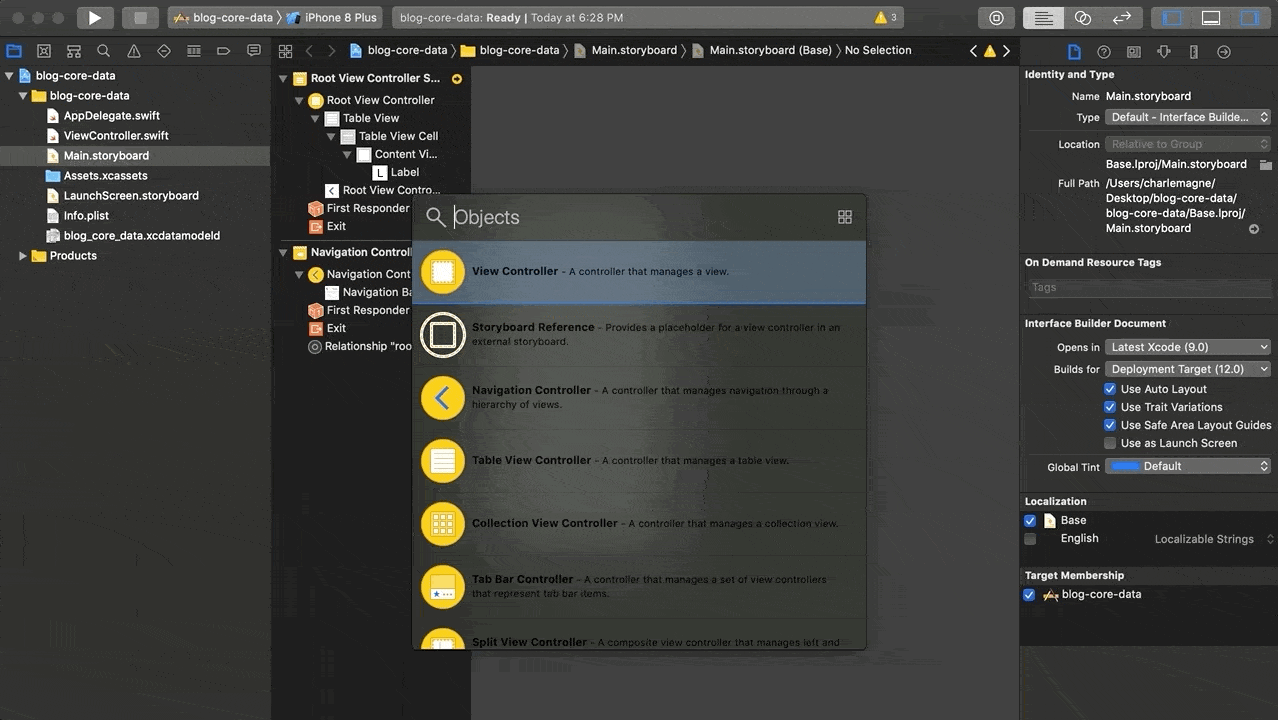
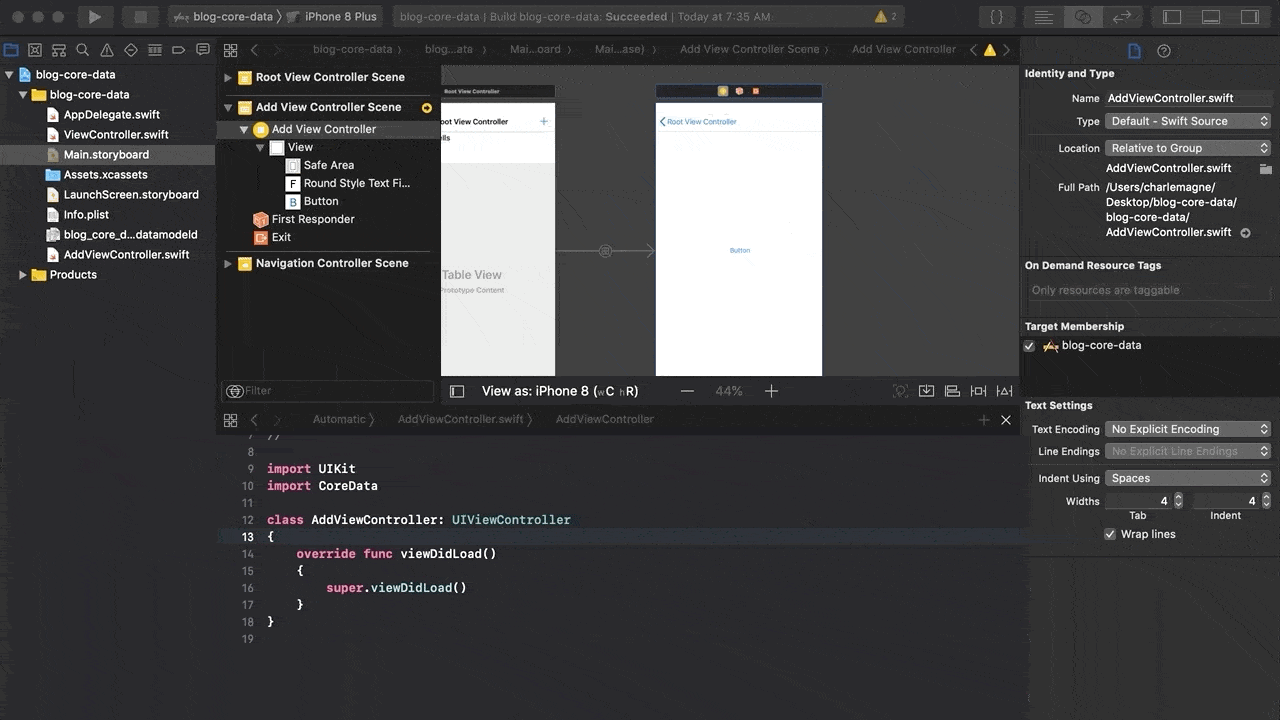
Next, we’ll want to re-add a new View Controller, this will be the “Detail/Add Task” view of our application.
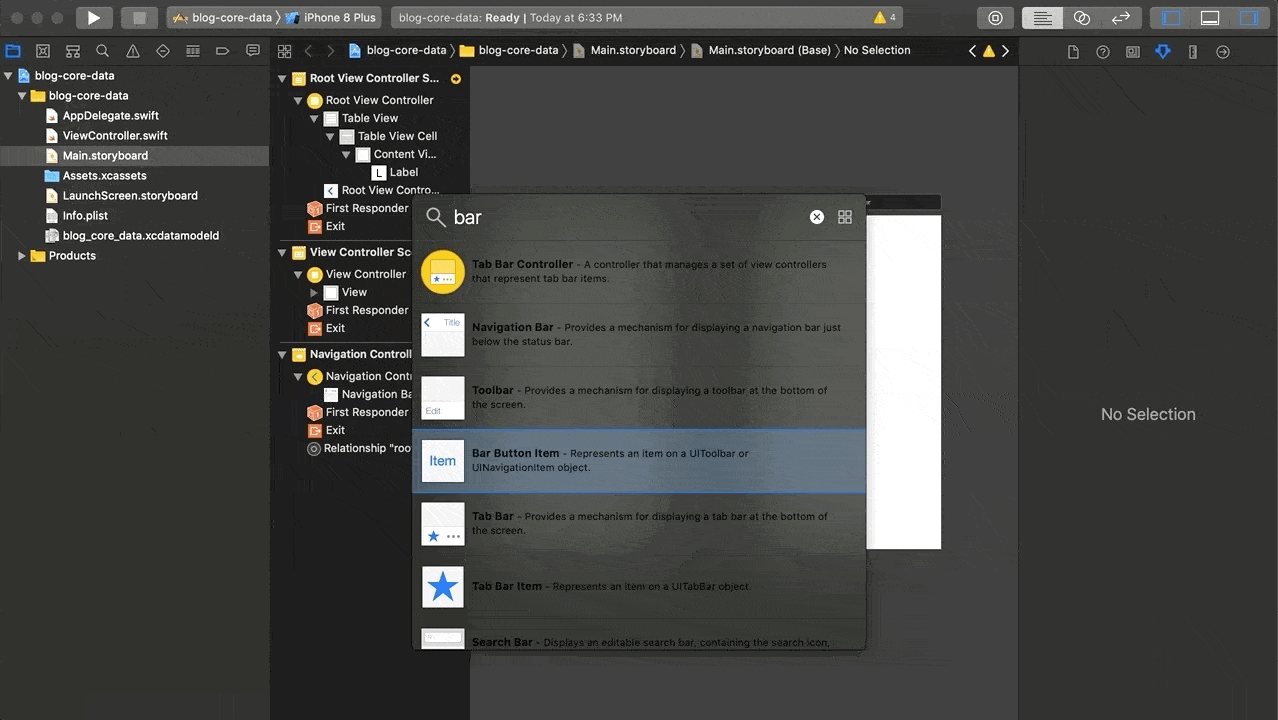
After adding our new View Controller, we’ll want to create a way for us to navigate to that View, to do this, add a Bar Button Item from the Library and drag it into the Right Bar Button slot on the Navigation Item. After we’ve put the Bar Button Item on our Navigation Item, we’ll want to create a connection to Segue from our “root” view to our “detail” view, in order to do this, control-click the Bar Button item we’ve added and drag it onto our “detail” view controller. Choose “Show” as the segue in the popup that appears and on our Right Bar Button Item, change the System Item from Custom to Add.
Finally, we’ll want to set up our Navigation Controller as the initial view controller, to do this, select the Navigation Controller in our storyboard, and in the Attributes Inspector, check “Is Initial View Controller”. After doing this, you should be able to build and run the app in simulator to navigate between our root view and our detailed view.
Now that we’ve set up our storyboard a bit, lets create an entity in our Core Data model.
Creating the Core Data Entity
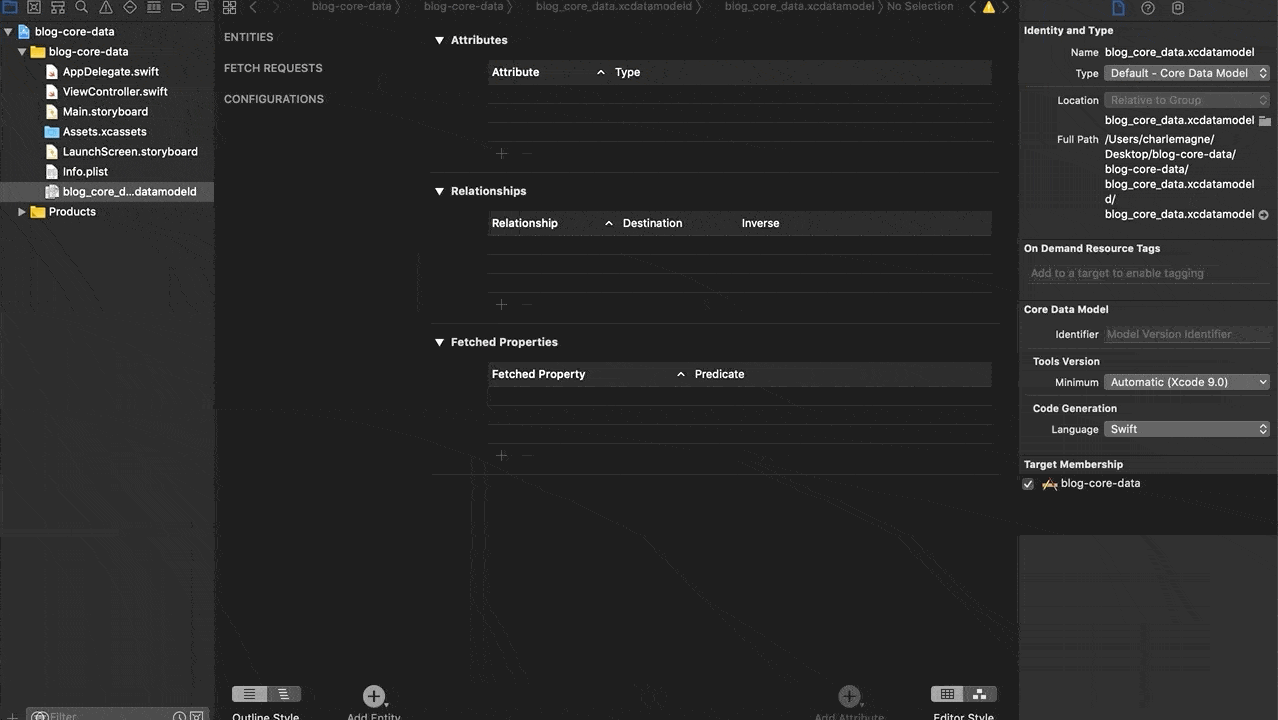
In our application, we’re going to use Core Data to store the tasks that we will eventually add from our “details” view controller. In Core Data you can create entities and these entities consist of Attributes, Relationships, and Fetched Properties. In our app, we are going to create a simple entity named “Task” with one attribute called “name”. To do this, we need to open our .xcdatamodeld file. After opening the file, we can select “Add Entity” to create the entity. Rename the entity “Task” and add a new attribute called “name” and set the attribute type to “String”.
Now that we’ve created our entity and set up our storyboard, we can start digging into some code.
Setting up the Root View Controller
The first thing we’ll need to do code-wise is modify our original ViewController file that Xcode generated for us when we created our project to work with the UITableViewController that we setup in our storyboard. To do this, open ViewController.swift and replace the contents with the following:
import UIKit

class ViewController: UITableViewController
{
    override func viewDidLoad() {
        super.viewDidLoad()
        // Do any additional setup after loading the view, typically from a nib.
    }

    override func viewDidAppear(_ animated: Bool) {

    }
}
After replacing our code in ViewController.swift, open Main.storyboard again as we’ll need to set the class of our root view controller to our ViewController. Select the Root View Controller and in the Identity Inspector, set the Class to ViewController.
After assigning the class, select the interlocking rings to open the Assistant Editor. When the Assistant Editor opens, the swift file displayed should be our ViewController.swift file. In ViewController.swift we’re going to want to create an IBOutlet to the UITableView in our storyboard.
To get started, in ViewController.swift we’re going to want to import CoreData as such:
import CoreDataIf you’ve looked in AppDelegate.swift at all, you’ll noticed that there are some functions and variables generated for the use of Core Data. We’ll want to add a reference to our AppDelegate in ViewController. To do this, add this line to the in the ViewController class.
let appDelegate = UIApplication.shared.delegate as! AppDelegateAny time that we need to reference our AppDelegate we’ll be able to use this immutable variable. We’ll also want to set up our UITableView’s data source and specify the how the cells should be populated. Modify the code within viewDidLoad() with the following:
override func viewDidLoad()
{
    super.viewDidLoad()
    vwTableView.delegate = self
    vwTableView.dataSource = self
    vwTableView.register(UITableViewCell.self, forCellReuseIdentifier: "taskCell")
}
"taskCell" is a reference to the UITableViewCell that we specified the reuse identifier on earlier. I encourage you to check out reading up on the table view’s delegate and dataSource as well. Next we’ll also want to add an array that will store the data from our entity and also add the overrides for populating our table view. For the overrides we will use the following:
override func tableView(_ tableView: UITableView, numberOfRowsInSection section: Int) -> Int
{
    return taskData.count
}

override func tableView(_ tableView: UITableView, cellForRowAt indexPath: IndexPath) -> UITableViewCell
{
    let cell = vwTableView.dequeueReusableCell(withIdentifier: "taskCell", for: indexPath)
    cell.textLabel?.text = taskData[indexPath.item]
    return cell
}
and at the top of ViewController add:
var taskData = [String]()taskData will store the data that we pull from Core Data, and we can use it to populate our table view.
Next, within viewDidAppear() we will want to add the actual code to get our data from Core Data:
override func viewDidAppear(_ animated: Bool)
{
    taskData = [String]()

    let context = appDelegate.persistentContainer.viewContext

    let request = NSFetchRequest<NSFetchRequestResult>(entityName: "Task")
    request.returnsObjectsAsFaults = false
    do
    {
        let result = try context.fetch(request)
        for data in result as! [NSManagedObject]
        {
            taskData.append(data.value(forKey: "name") as! String)
        }
    }
    catch
    {
        print("Failed")
    }

    vwTableView.reloadData()
}
As you’ll see in the code, we can specify the entity that we wish to get data from, and the key(attribute) that we want to retrieve. After adding all of these snippits your ViewController class should look something like this:
class ViewController: UITableViewController
{
    @IBOutlet var vwTableView: UITableView!
    var taskData = [String]()

    let appDelegate = UIApplication.shared.delegate as! AppDelegate

    override func viewDidLoad()
    {
        super.viewDidLoad()
        vwTableView.delegate = self
        vwTableView.dataSource = self
        vwTableView.register(UITableViewCell.self, forCellReuseIdentifier: "taskCell")
    }

    override func viewDidAppear(_ animated: Bool)
    {
        taskData = [String]()

        let context = appDelegate.persistentContainer.viewContext

        let request = NSFetchRequest<NSFetchRequestResult>(entityName: "Task")
        request.returnsObjectsAsFaults = false
        do
        {
            let result = try context.fetch(request)
            for data in result as! [NSManagedObject]
            {
                taskData.append(data.value(forKey: "name") as! String)
            }
        }
        catch
        {
            print("Failed")
        }

        vwTableView.reloadData()
    }

    override func tableView(_ tableView: UITableView, numberOfRowsInSection section: Int) -> Int
    {
        return taskData.count
    }

    override func tableView(_ tableView: UITableView, cellForRowAt indexPath: IndexPath) -> UITableViewCell
    {
        let cell = vwTableView.dequeueReusableCell(withIdentifier: "taskCell", for: indexPath)
        cell.textLabel?.text = taskData[indexPath.item]
        return cell
    }
}
Now lets talk a little bit about whats going on in our ViewController. When our UITableViewController’s view loads, we’re assigning vwTableView’s delegate and dataSource properties to “self” which means that when we reload our vwTableView its going to use the function overrides that we’ve specified in our controller. We are also registering what cell should be used when repopulating vwTableView which is the cell that we had given a reuse identifier earlier. If you end up building and running the application later and the table’s cells are blank, I’d recommend reading back and possibly adding the reuse identifier. We use taskData as a string array to store the values that we are retrieving from Core Data, so that we can use the count of objects when populating the proper number of rows needed for our table view. In our viewDidAppear() we reinitialize the string array so that it blank upon load, then reload the table to clear any previous values. After that has been done we declare the viewContext from our App Delegate and use that to fetch from Core Data. After that, we reload the table again to populate it with the data we’ve retrieved. When we reload the table, we simply set the label’s text in the reusable cell that is being generated from our reuse identifier to the text that we’ve fetched. Now we should have everything set up for retrieving data from our Core Data entity and populating our view with it, but now we need a way to populate our entity in the first place.
Setting up the Details View Controller
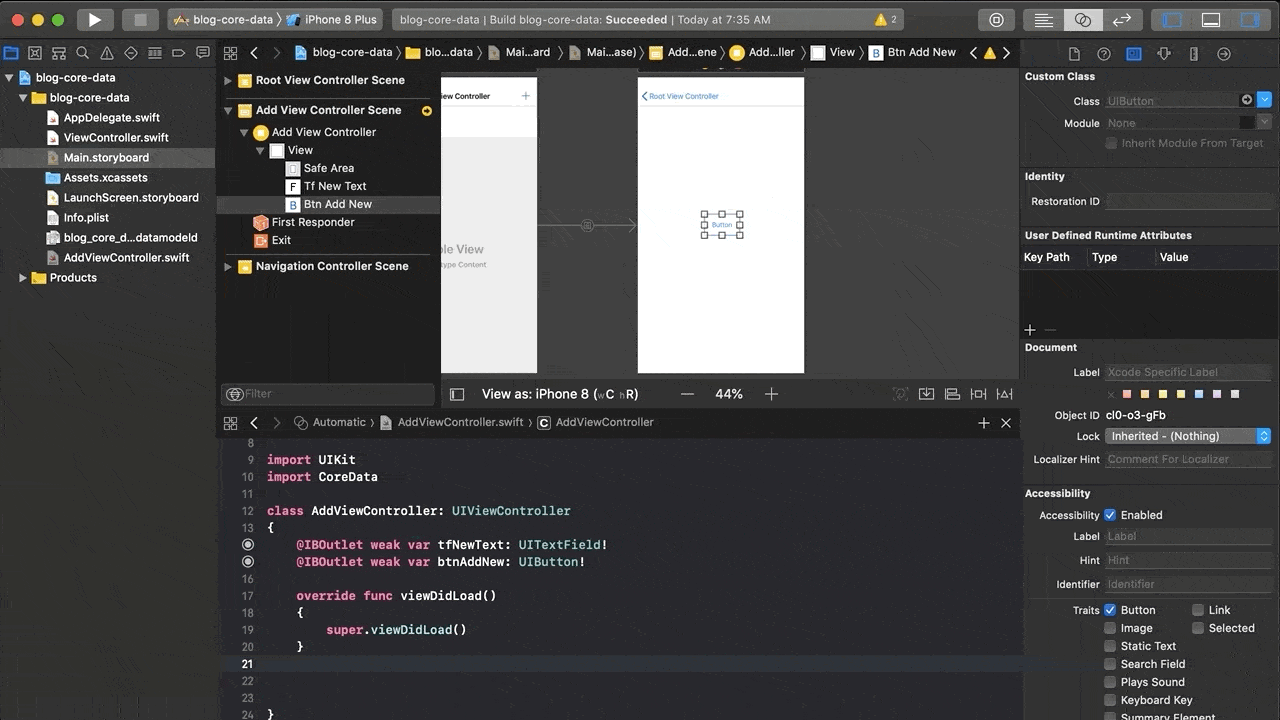
First, open Main.storyboard again as we’ll need to add the controls to be able to input text into our application. After opening Main.storyboard drag a new text field and button onto the view controller that we had created a segue to earlier.
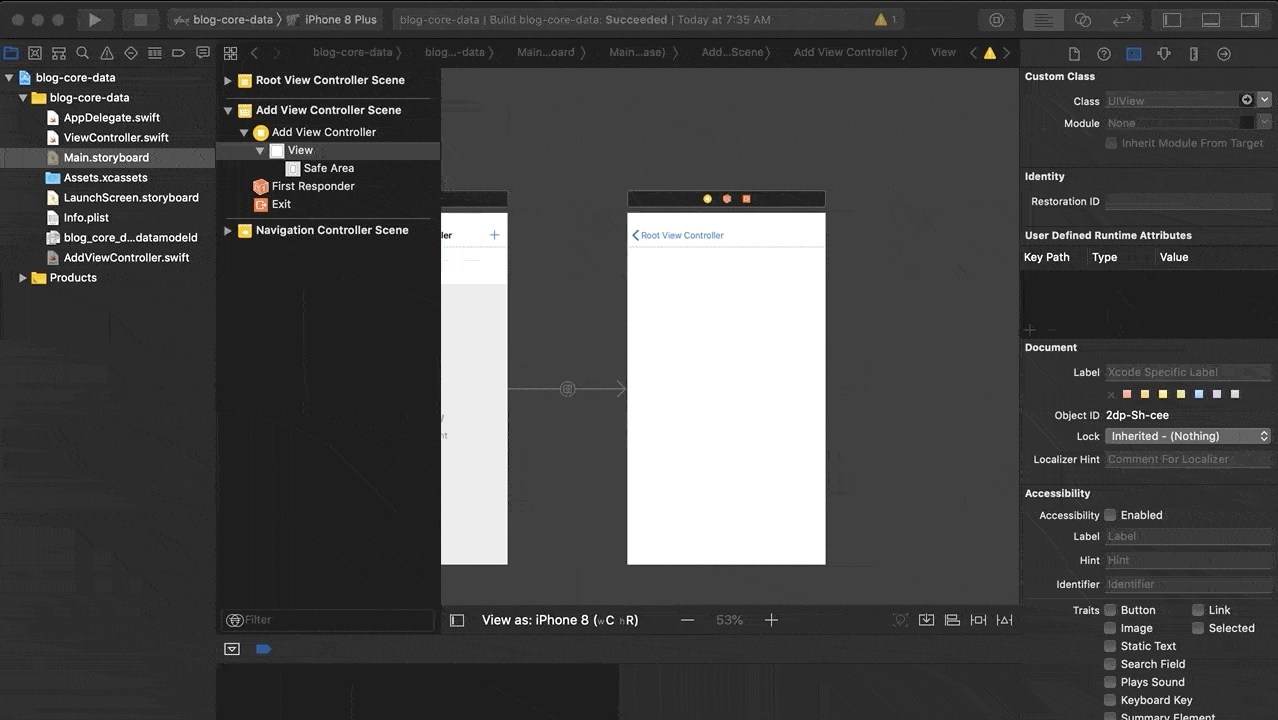
These are the controls that we will be using to enter our tasks into our application. Resize the controls as you wish. After setting up the view controller to your liking, we’ll need to add a new class for our view controller, so create a new Swift file and name it AddViewController.swift. Within our new AddViewController.swift file add the following code:
import UIKit
import CoreData

class AddViewController: UIViewController
{
    override func viewDidLoad()
    {
        super.viewDidLoad()
    }
}
We will add more code to it in a sec, but first we’ll want to return to our Main.storyboard and assign our new class to our view controller in Interface Builder.
Now that we’ve assigned our view controller to the proper class, we’ll be able to open the assistant editor, so open the assistant editor and create an IBOutlet for the text field and button we’ve added.
We’ll also want to create an IBAction for when our button is pressed. Using the Assistant Editor, create an event for “Touch Down” on our button named “addNew”.
Within the new function for the event that we’ve created add the following code:
@IBAction func addNew(_ sender: Any)
{
    let context = appDelegate.persistentContainer.viewContext

    let entity = NSEntityDescription.entity(forEntityName: "Task", in: context)
    let newTask = NSManagedObject(entity: entity!, insertInto: context)

    newTask.setValue(tfNewText.text, forKey: "name")

    do
    {
        try context.save()
    }
    catch
    {
        print("Failed Saving")
    }

    let _ = navigationController?.popViewController(animated: true)
}
After adding the code for the event create an immutable variable for our appDelegate as we had done in our other view controller at class scope.
let appDelegate = UIApplication.shared.delegate as! AppDelegateNow looking through the code that we’ve added, you’ll see that we reference the viewContext from our App Delegate again and then create an entity. We get the description of the entity by specifying the entity name and our context using an NSEntityDescription. After this we set the value of the task we’ve instantiated to the text we’ve entered into our text box and simply save the entity. Now this should be all that we need to be able to build and run our app for the last time and add/view our tasks!
The Home Stretch
If you’ve stuck with it thus far and followed the steps properly, you should now be able to build and run your app and end up with the following:

Hopefully this app tutorial helps others, as it was the type of application I was looking for when originally starting with Core Data myself. If you have any questions feel free to leave comments in the section below, or send me an email or tweet me using the links on my profile below.
Subscribe to Norfare
Get the latest posts delivered right to your inbox